How to Waterproof a Wooden Balcony - Explore the Most Useful Guide
A wooden balcony can be a charming addition to your home, providing a cost outdoor space for relaxation and entertainment. However, to ensure its longevity and protect it from the elements, it's crucial to waterproof it properly. In this informative blog, we will guide you on how to waterproof a wooden balcony, helping you preserve its beauty for years to come.

Materials and Tools You'll Need:
1.
Pressure-treated
wooden planks
2.
Waterproofing
sealer or stain
3.
Paintbrush or
roller
4.
Sandpaper (medium
and fine-grit)
5.
Caulk gun and
waterproof caulk
6.
Flashing tape
7.
Tar paper
8.
Deck membrane or
waterproofing membrane
9.
Hammer and nails
10. Screwdriver and
screws
11. Safety gear
(gloves, goggles, mask)
Before you begin waterproofing your wooden balcony, thoroughly inspect it for any existing damage, rot, or loose boards. How to waterproof a wood deck? Replace or repair any damaged sections.
Step 2: Clean and Sand
Clean the entire balcony surface, removing dirt, debris, and any existing coatings. Use medium-grit sandpaper to smooth the wood's surface and finish with fine-grit sandpaper for a smoother result.
Step 3: Apply Waterproofing Sealer or Stain
Choose a high-quality waterproofing sealer or stain that suits your balcony's aesthetic. Apply the sealer or stain evenly to all wooden surfaces, including the underside of the balcony. Pay special attention to the end grains of the wood, as they are vulnerable to moisture infiltration.
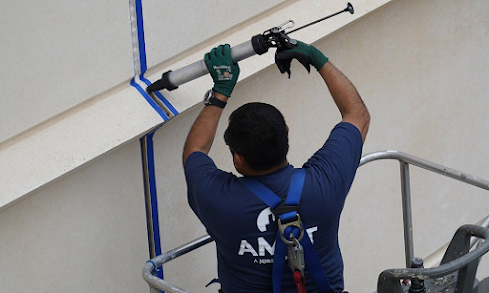
Step 4: Install Flashing and Caulk
To prevent water from seeping between the balcony and the house, install flashing tape along the connection. Seal all gaps and joints with waterproof caulk, especially around railing posts and corners. Make sure the caulk is properly cured before moving on.
Step 5: Install Tar Paper
Lay down a layer of tar paper over the entire balcony surface. This acts as a moisture barrier and helps protect the wood from water damage.
Step 6: Install a Deck Membrane
For added protection, consider installing a deck membrane or waterproofing membrane over the tar paper. These membranes are specifically designed to prevent water penetration while allowing the wood to breathe.
Step 7: Secure Loose Boards
Check for any loose boards on the balcony and secure them with screws. Wood balcony repair boards can lead to water infiltration and further damage.
Step 8: Maintenance
Regularly inspect your wooden balcony for signs of wear and tear. Reapply a waterproofing sealer or stain every few years or as recommended by the product manufacturer. Replace damaged or deteriorating caulking and flashing promptly to maintain the waterproofing integrity.
Waterproofing your wooden balcony is an essential step in preserving its beauty and structural integrity. By following these steps and conducting regular maintenance, you can enjoy your outdoor space for years to come, even in the face of adverse weather conditions. Remember that using high-quality materials and taking your time with the process will yield the best results, ensuring your wooden balcony remains a welcoming and durable addition to your home.
Choosing the Right Residential Waterproofing Contractors
Waterproofing your home is a crucial investment in protecting your property from water damage and its associated problems. Whether you're dealing with a leaky basement, a damp crawl space, or other moisture-related issues, hiring the right residential waterproofing contractors can make all the difference. In this informative blog, we'll guide you through the process of selecting the best contractors for your waterproofing needs.

1. Assess Your Needs: Before you start searching for contractors, it's essential to identify the specific waterproofing issues in your home. This might include basement leaks, foundation cracks, or problems with exterior drainage. Understanding your needs will help you communicate effectively with potential contractors and ensure they can address your concerns.
2. Research and Recommendations: Start by seeking recommendations from friends, family, neighbors, or online review platforms. Compile a list of potential contractors and research their backgrounds, credentials, and customer reviews. Look for contractors who specialize in residential waterproofing and have a proven track record of successful projects.
3. Check Credentials and Licensing: Ensure that the contractors you consider are licensed and insured. Licensing requirements may vary by location, so check with your local authorities to understand what's necessary. Verify that the contractor carries liability insurance to protect you in case of accidents or damage during the project.
4. Request References: Ask potential contractors for references from past clients. Contact these references to inquire about their experiences with the contractor, including the quality of work, communication, and adherence to timelines and budgets. Satisfied customers are a good sign of a reputable contractor.
5. Obtain Multiple Quotes: Don't settle for the first contractor you find. Get multiple quotes from different contractors to compare their prices, services, and warranties. Be cautious of unusually low bids, as they may indicate subpar materials or workmanship.
6. Understand the Waterproofing Methods: Ask each contractor to explain their waterproofing methods and materials. The best contractors will be transparent about their processes and recommend solutions tailored to your specific needs. They should also be up-to-date with the latest waterproofing technologies and products.
7. Evaluate Communication: Effective communication is crucial for a successful project. Pay attention to how responsive and clear each contractor is during the initial consultation. Clear communication throughout the project will ensure that any issues or changes are addressed promptly.
8. Warranty and Guarantee: Inquire about the warranty and guarantee offered by each contractor. A reputable contractor should stand behind their work and offer a warranty that covers both materials and labor. Be sure to get all warranty details in writing.
9. Check for Permits: Ask the contractors about the permits required for your waterproofing project. A professional contractor should be familiar with local building codes and regulations and help you secure the necessary permits.
10. Sign a Detailed Contract: Once you've chosen a contractor, make sure to sign a detailed contract that outlines all project specifics, including the scope of work, materials, timelines, payment schedules, and any other relevant terms and conditions. Review the contract carefully before signing.
Conclusion
Hiring the right residential waterproofing contractors is essential to protect your home from water damage and ensure the longevity of your property. Waterproof company following these steps and conducting thorough research, you can make an informed decision and choose a contractor who will deliver quality work and peace of mind. Remember that investing in professional waterproofing can save you significant money and headaches in the long run.

Comments
Post a Comment